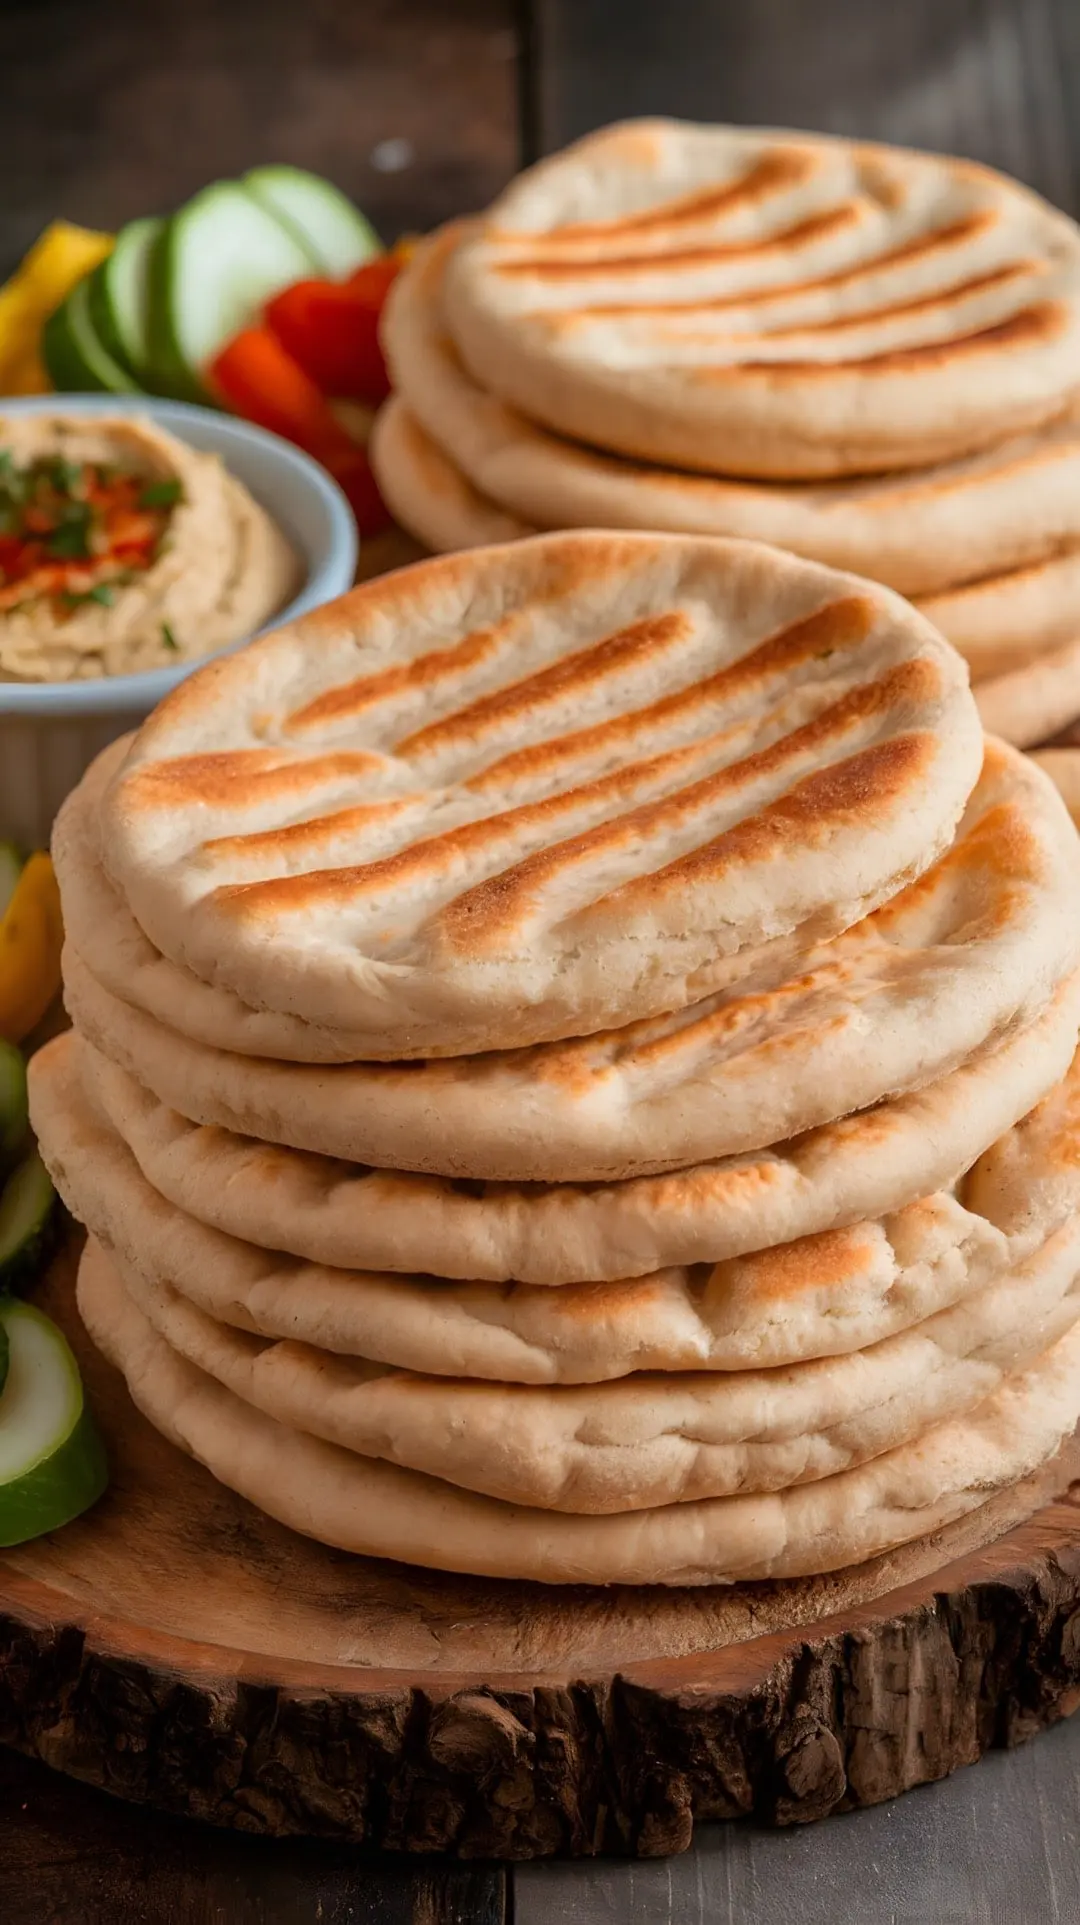
Hello everyone! 🎉 I am beyond excited to share my special recipe for Gluten-Free Pita Bread with you today! If you’ve ever been disappointed by dry, cardboard-like pita bread, you’re in for a treat. This recipe yields pita that is soft, tender, and bursting with flavor. Plus, it’s incredibly easy to make! Let’s dive in and discover how to make this delightful bread right in your own kitchen.
Ingredients
Ingredient | Quantity |
---|---|
Water | 1 cup |
Milk | 1/2 cup |
Olive Oil | 1/4 cup |
Instant Yeast | 2 teaspoons |
Sugar | 1 teaspoon |
Salt | 1 teaspoon |
Gluten-Free Flour | 2 1/2 cups |
Instructions
Making the Dough
- Prepare the Liquid Ingredients: Begin by weighing and adding the cold water and milk into your mixing bowl. The cold temperatures help keep the yeast dormant, ensuring the dough rises perfectly.
- Add Olive Oil: Pour in a generous amount of olive oil. While olive oil isn’t typically found in most pita bread recipes, it adds a wonderful softness and tenderness to this gluten-free version.
- Incorporate Dry Ingredients: Mix in instant yeast, sugar, and salt. For accuracy, I prefer weighing everything directly into the bowl rather than using measuring cups. This method simplifies the process and ensures precision.
- Combine and Mix: Stir the ingredients until well combined. For a thorough mix, you can use a handheld mixer or a Danish dough whisk. Continue mixing for about 5 minutes, or a bit longer if you’re doing it by hand.
- Refrigerate: Scrape down the dough, cover it, and place it in the refrigerator. Let it rest for 24 hours to enhance its texture and flavor.
Shaping and Baking
- Preheat the Oven: Preheat your oven to 450°F (232°C) with a baking stone, baking steel, or an overturned baking sheet on the lowest rack. This high heat will help the pitas puff up beautifully.
- Divide and Shape: Weigh the dough into 95-gram portions. Roll each piece into a smooth ball. Place the dough on a lightly floured surface and roll out each ball into a 6-inch diameter circle.
- Prepare for Baking: If you prefer, you can sprinkle flour on the surface and top of the dough, or dip the dough directly into flour. Ensure each pita is evenly rolled to achieve the perfect puff.
- Bake: Transfer the rolled-out dough onto a parchment-lined sheet. Using a pizza paddle, slide them into the oven. Bake each pita for about 5 minutes or until they puff up and develop a golden-brown color.
- Finishing Touches: Once baked, brush each pita with butter on both sides while they’re still warm. Stack them with paper towels between each one and cover with a towel to keep them soft and warm.
Tips for Success
- Yeast Activation: Keeping the yeast dormant in the beginning helps achieve a better rise and texture.
- Rolling Consistency: Ensure the pitas are evenly rolled to allow them to puff properly during baking.
- Warm Storage: Stacking pitas with paper towels and a towel keeps them warm and soft, making them perfect to enjoy immediately!
Gluten-Free Pita Bread Recipe
Equipment
- 1 Mixing bowl
- 1 dough whisk or mixer
- 1 baking stone or sheet
- 1 pizza paddle
- 1 parchment paper
Ingredients
- 1 cup Water
- 1/2 cup Milk
- 1/4 cup Olive Oil
- 2 teaspoons Instant Yeast
- 1 teaspoon Sugar
- 1 teaspoon Salt
- 2 1/2 cups Gluten-Free Flour
Instructions
Making the Dough
- Prepare the Liquid Ingredients: Begin by weighing and adding the cold water and milk into your mixing bowl. The cold temperatures help keep the yeast dormant, ensuring the dough rises perfectly.
- Add Olive Oil: Pour in a generous amount of olive oil. While olive oil isn’t typically found in most pita bread recipes, it adds a wonderful softness and tenderness to this gluten-free version.
- Incorporate Dry Ingredients: Mix in instant yeast, sugar, and salt. For accuracy, I prefer weighing everything directly into the bowl rather than using measuring cups. This method simplifies the process and ensures precision.
- Combine and Mix: Stir the ingredients until well combined. For a thorough mix, you can use a handheld mixer or a Danish dough whisk. Continue mixing for about 5 minutes, or a bit longer if you’re doing it by hand.
- Refrigerate: Scrape down the dough, cover it, and place it in the refrigerator. Let it rest for 24 hours to enhance its texture and flavor.
Shaping and Baking
- Preheat the Oven: Preheat your oven to 450°F (232°C) with a baking stone, baking steel, or an overturned baking sheet on the lowest rack. This high heat will help the pitas puff up beautifully.
- Divide and Shape: Weigh the dough into 95-gram portions. Roll each piece into a smooth ball. Place the dough on a lightly floured surface and roll out each ball into a 6-inch diameter circle.
- Prepare for Baking: If you prefer, you can sprinkle flour on the surface and top of the dough, or dip the dough directly into flour. Ensure each pita is evenly rolled to achieve the perfect puff.
- Bake: Transfer the rolled-out dough onto a parchment-lined sheet. Using a pizza paddle, slide them into the oven. Bake each pita for about 5 minutes or until they puff up and develop a golden-brown color.
- Finishing Touches: Once baked, brush each pita with butter on both sides while they’re still warm. Stack them with paper towels between each one and cover with a towel to keep them soft and warm.
Notes
- Yeast Activation: Keeping the yeast dormant in the beginning helps achieve a better rise and texture.
- Rolling Consistency: Ensure the pitas are evenly rolled to allow them to puff properly during baking.
- Warm Storage: Stacking pitas with paper towels and a towel keeps them warm and soft, making them perfect to enjoy immediately!