Gluten-Free Chocolate Chip Cookies
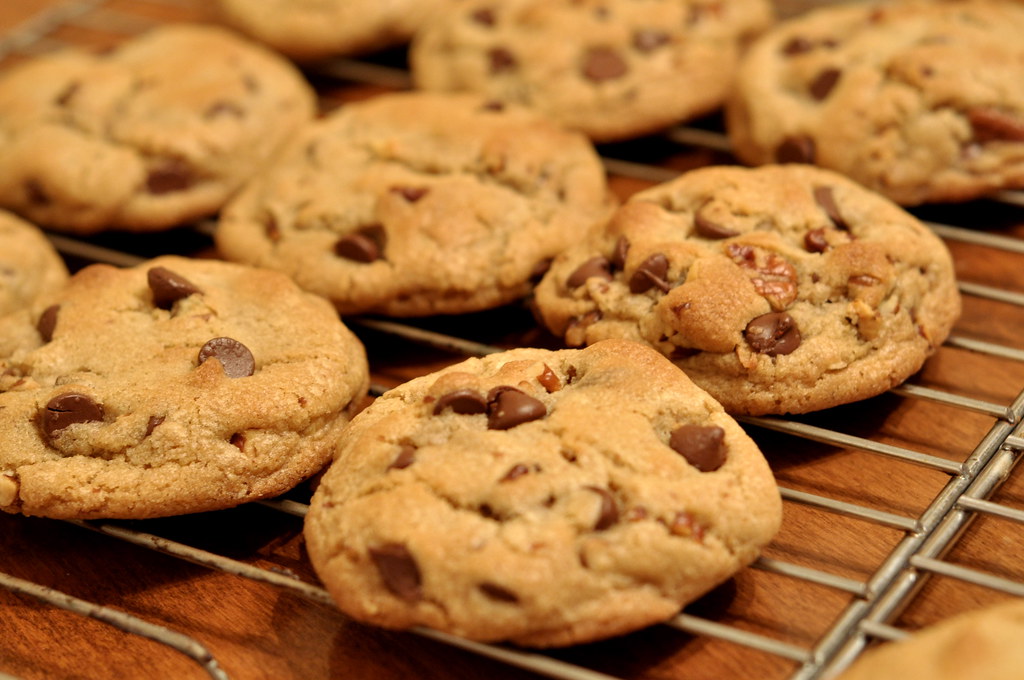
These gluten-free chocolate chip cookies are a dream come true for anyone looking to satisfy their sweet tooth without compromising on flavor or texture. Soft and chewy on the inside, with perfectly golden edges, every bite is packed with just the right amount of chocolatey goodness. This recipe is simple and classic, using straightforward ingredients—nothing too fancy. Plus, there’s even an option to make them dairy-free! With just 15 minutes of prep time, these cookies are perfect for when those cookie cravings strike.
Ingredients
The best part of this recipe is that you only need eight ingredients, many of which you likely already have in your pantry. Here’s what you’ll need:
- 1/2 cup melted and cooled butter or coconut oil (refined coconut oil for a neutral flavor)
- 1/2 cup coconut sugar
- 1 large egg
- 2 tsp vanilla extract
- 2 cups almond flour
- 1 tsp salt
- 1 tsp baking soda
- 1 cup chocolate chips (milk or dark, your choice)
Equipment
To make these cookies, you’ll need a few basic kitchen tools:
- Large mixing bowl
- Whisk
- Mixing spoon
- 1 1/2 tablespoon cookie scoop (optional)
- Baking sheet(s)
- Parchment paper
Instructions
1. Preheat the Oven
Start by preheating your oven to 400°F (200°C). This ensures the cookies will bake evenly and have those lovely golden edges.
2. Mix the Wet Ingredients
In a large bowl, combine 1/2 cup of melted and cooled butter or coconut oil, 1/2 cup of coconut sugar, 1 egg, and 2 teaspoons of vanilla extract. Whisk everything together until the coconut sugar is fully absorbed, and the mixture is smooth and slightly thickened.
Pro Tip: Make sure your butter or coconut oil is cooled to avoid scrambling the egg when you mix it in.
3. Combine the Dry Ingredients
To the wet mixture, add 2 cups of almond flour, 1 teaspoon of salt, and 1 teaspoon of baking soda. Swap your whisk for a spoon and stir everything together until you have a thick dough, and the almond flour is fully incorporated.
4. Fold in the Chocolate Chips
Fold in 1 cup of chocolate chips. If you want your cookies to look extra tempting, save a small handful of chocolate chips to press onto the tops of the cookies before baking. This guarantees that every cookie will have that perfect chocolate chip-studded look.
5. Scoop the Dough onto Baking Sheets
Line your baking sheet(s) with parchment paper. Use a 1 1/2 tablespoon cookie scoop (or a regular spoon) to dollop the dough onto the baking sheet, spacing the cookies evenly apart. If you’re using the cookie scoop, you should get about 18 cookies. For larger cookies, use a 2-tablespoon scoop, which will yield about 12 cookies.
6. Flatten the Cookies
Gently press each dough ball with your fingers to flatten them slightly. The dough won’t spread much on its own, so this step helps give the cookies a head start in achieving their final shape.
7. Add Extra Chocolate Chips
Once you’ve flattened the cookies, press a few of the reserved chocolate chips into the tops of the dough where there are any bare spots. This will make the cookies look even more enticing after they bake.
8. Bake the Cookies
Bake the cookies for 10-12 minutes, or until they’ve flattened slightly and the edges look lightly golden. Keep in mind that the color change will be subtle, so set your timer to avoid overbaking.
Note: These cookies are meant to be soft and chewy, not crispy, so they don’t need to spend too much time in the oven.
9. Let Them Cool
After you remove the cookies from the oven, let them cool for a few minutes on the baking sheet. They will still be soft when you take them out, but they’ll firm up as they cool.
10. Enjoy!
Whether you prefer milk chocolate for a gooey bite or dark chocolate for a richer flavor, these cookies are absolutely delicious. Pair them with a cold glass of cashew milk for a real treat. Enjoy!
